
The first thing that comes to the mind of a developer after installing the database is “How to connect with it?” In the Oracle Database ecosystem we connect with the database through Schemas also called Users. This could be a user-created schema or a sample schema. I will use the sample schema for the demonstration and show you how to connect with it.
Though I am using a sample schema, you can use this process to connect with any user in your Oracle Database since the steps are the same
The Process
The technique we will use to connect with the user account will be TNS Service. For the demonstration, I will be using the HR user account. Although I will be using the HR user account, the process will be the same for all the user accounts in the Oracle database.
For detailed knowledge of TNS services, you can check out my tutorial on TNS services. Also, if you haven’t installed the HR sample user yet, then check out the tutorial on how to install HR users to the latest Oracle Database.
Gather Information for TNS service.
So the database that I have configured right now on my system is Oracle Database 21c. You can check out the version of your database using this statement.
SELECT banner FROM v$version;
It has a pluggable database named ORCLPDB. I am going to create a TNS entry for this pluggable database. And to do that we need to find out the service name corresponding to our pluggable database ORCLPDB. Let’s quickly do that.
To discover the service name of any pluggable database we need its container ID. To find out the container id we can query the v$pdbs view like this.
C:/> SQLPLUS / as sysdba
connect with the database using sysdba.
SQL> COLUMN name FORMAT a15;
SQL> SELECT name, con_id FROM v$pdbs;
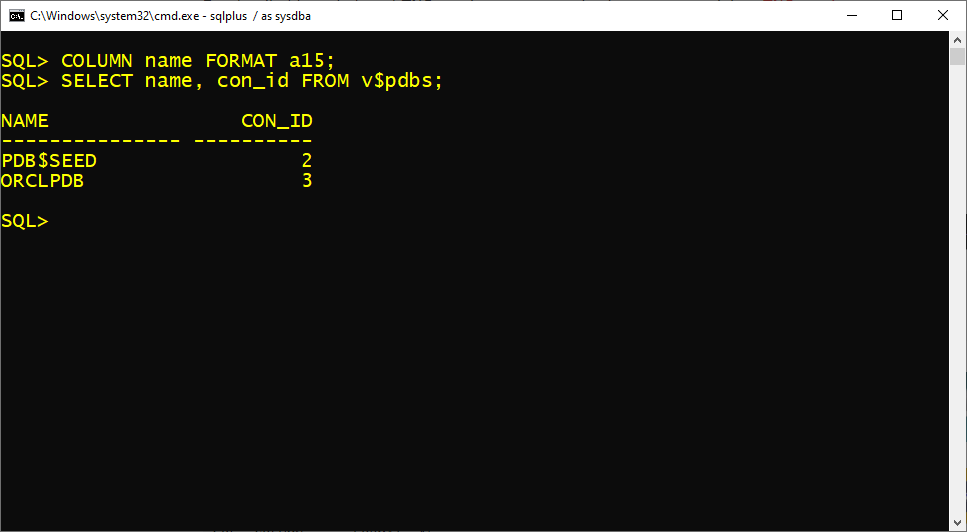
As you can see in the above screenshot that the container id for our pluggable database orclpdb is 3. Let’s use this information and find out the corresponding service name.
To find out the service name we will query the v$active_services view. Like this
C> SQLPLUS / as sysdba
SQL>COLUMN "Service Name" FORMAT a15;
SQL> SELECT name AS "Service Name" FROM v$active_services
WHERE con_id = 3;
This statement will show you the service name.
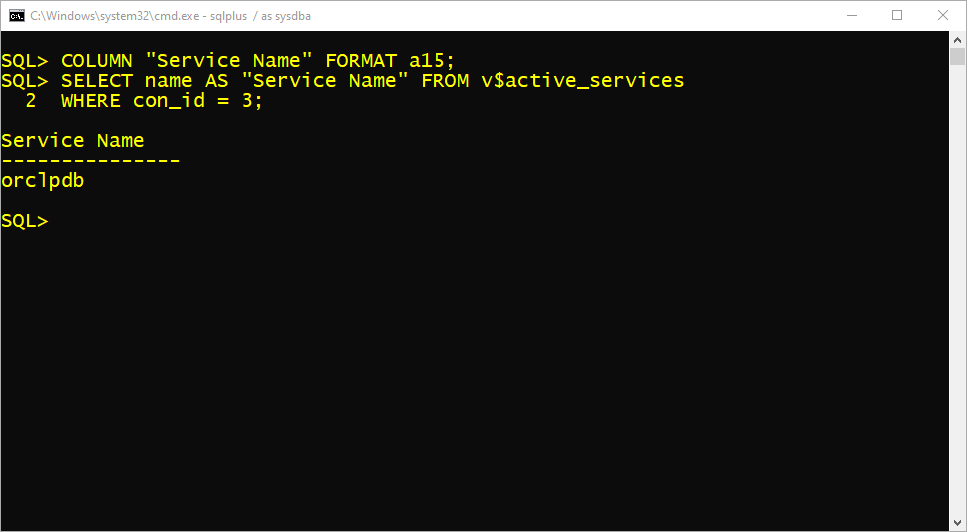
As you can see in the above screenshot that the service name of the pluggable database is “orclpdb”. Though in most cases the database and its service share the same name. But it’s recommended to always check it once before making any further move.
Create a TNS service
First, launch the Net configuration assistant. For that open up your start menu and search NETCA. Now select “Run as administrator”.
Creating a TNS entry is an 8 step process and starts with this welcome screen. On the first screen, select the 3rd option which says “ Local Net Service Name Configuration” and press next.

On the second screen, select Add and then press next.

On the 3rd screen specify the service name that we figured out earlier. Which was ORCLPDB in my case.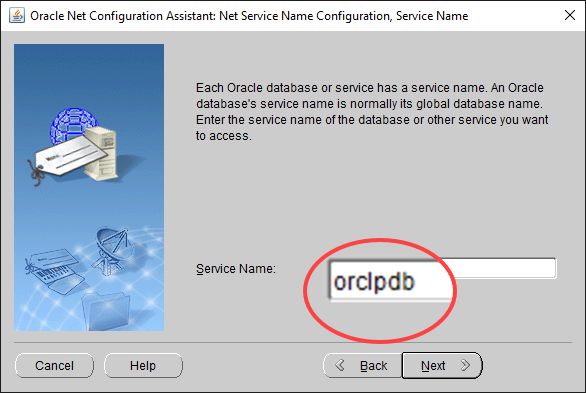
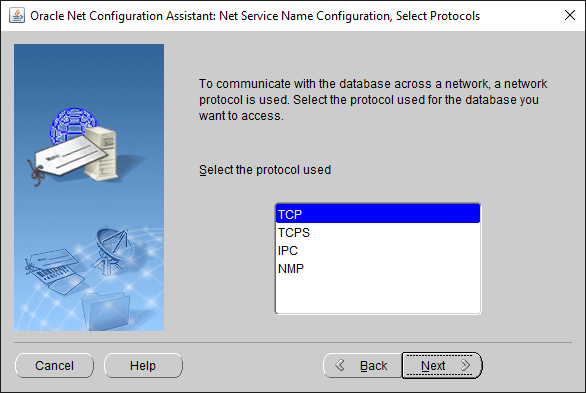
On the 4th screen select TCP as your protocol.
And on the 5th screen specify the hostname and the port number. Which in my case is “localhost”. For the port number, I will select the first option which says “ Use The standard port number of 1521”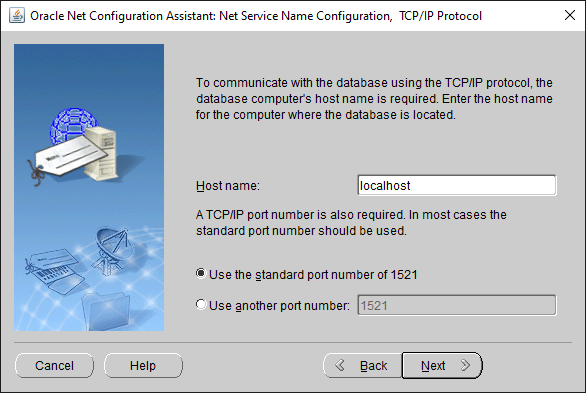
In case you don’t know the protocol, hostname and port number of your oracle database then you can refer to your listener.ora file for all this information.
On the 6th screen we will test our service. And for that we will select the 2nd option which says “Yes, perform a test”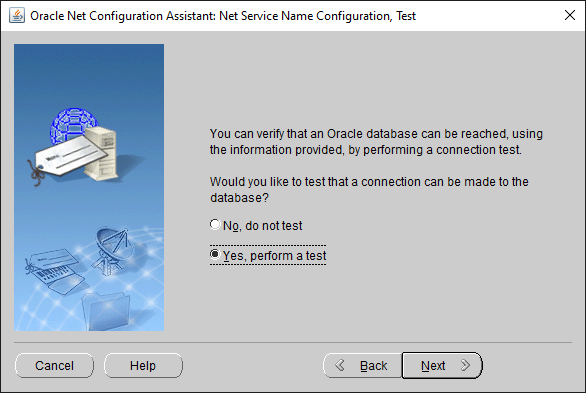
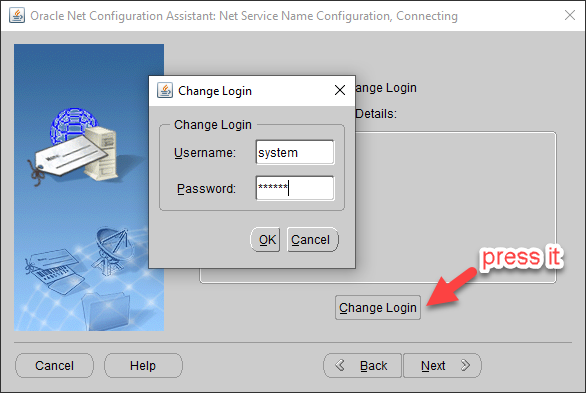
and then press next ”change login” and specify the username and password. User name is going to be “System” and Password will be the one that you have created while installing the Oracle Database.
After that press ok.
On the 8th screen you have to specify the name for your TNS entry. Though you can name it whatever you want but it’s recommended to name your TNS entry after the name of the pluggable database for which you are creating this service. Which in my case is ORCLPDB.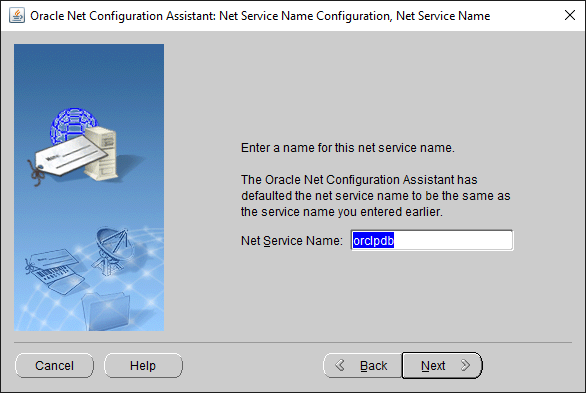
Now select No. Net Service name configuration complete. Press Finish & that’s it. That’s all you have to do.
Connect With The User
Connecting with any database user which is created inside our pluggable database for which we just created the TNS service is now very easy.
Step1: Open up your command prompt and write
c>SQLPLUS hr/hr@orclpdb
SQLPLUS followed by a username which is HR and then a forward slash followed by the password which in my case is also HR. Then you have to write @sign followed by the TNS service name which we just created.
Press enter.
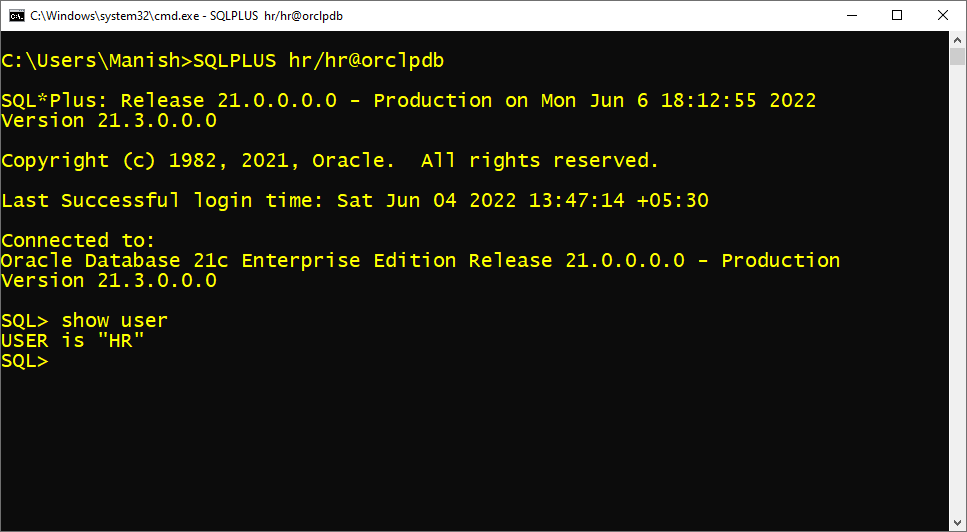
Voila! you are connected with the hr user now.
Connect With The User with SQL Developer
Similar to the SQLPLUS prompt, making a connection with the user using SQL Developer is again very simple. Below is the image showing all the necessary settings that you have to configure to establish a connection with the HR user in SQL Developer.
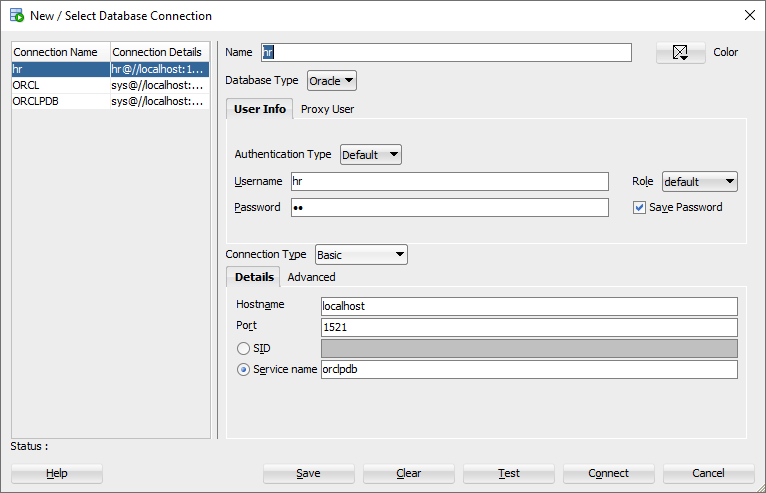
Similar to HR user, you can make a connection with any user just make sure, it is placed in the same pluggable database whose TNS service you are using for making the connection.
That’s it for this tutorial. Will catch you soon.
Thanks and have a great day


