Uninstalling Oracle Database properly from the operating system is very important. Especially for re-installation purposes. Improper uninstallation could raise n number of errors while re-installation. These errors are sometimes hard to decode. In this tutorial I will show you the proper process of uninstalling Oracle Database 21c from the Windows operating system.
Uninstalling Oracle Database 21c is a 5 step process. These are –
- Delete Environment Variable
- Delete Windows Registries
- Restart your Machine
- Delete Oracle Home and User Groups
- Delete Oracle 21c
For the demonstration, I will be uninstalling Oracle 21c from Windows 10 Professionalx64bit. You can follow the steps for any Windows operating system as the steps are the same.
Delete Environment Variable
During re-installation, not deleting the Environment Variable of the Oracle 21c may cause an “Environment Variable Path Is Too Long” Error. That is why deleting the environment variable is recommended and very important.
Here are the steps for deleting Environment Variable –
step 1 – Open Up The System properties
First launch your “Run command” box by pressing Win Key+R. After that write “sysdm.cpl” into it (without the quotes). This will open the System Properties box. In the system properties go to the “Advanced Tab” and click “Environment Variable”.

Step 2 – Delete Environment Variable
Once you open up the Environment Variable Windows, go to the “System Variable” section and find the system variable named “path” click and open it.
Inside the path variable find out the Environment variable that is pointing to your Oracle Home and Delete it.

Delete Windows Registries
In order to delete Oracle 21c from our system we need to get rid of all the background services. To delete those services we need to first delete all their corresponding windows registries. Here are the steps for doing that –
Deleting registry could crash your entire system so be careful. If something goes wrong I will not be responsible for that. Proceed with this step on your own responsibility.
Before performing this step, you need to take care of two things. These are –
- Only delete the registries that are listed below and nothing else.
- If you have any other software from Oracle Installed on your system, then consult your admin before deleting anything.
In any case it’s always best to take the backup of your registries first. In this quick video that I published on my Facebook Page I have shown how to take the back up of the registries. Do check that out.
Step1- Open up the registry editor
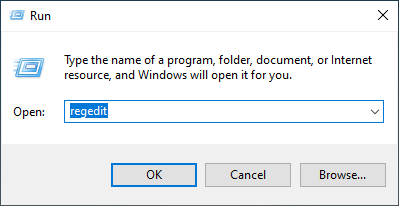
Once again to open up the registry editor we need to launch the “Run Command” box. You can open that run command box by pressing Win Key+R. After that write “regedit” into it. This will open up your Windows registry editor.
Step 2: Delete Software Registry
Now in the registry editor, Navigate to the Oracle registry. For that here is the path-
HKEY_LOCAL_MACHINE → SOFTWARE → ORACLE
Now right click on the Registry “ORACLE” and press delete
Step 3: Delete Services Registry
Next we will delete the registries for all the background services. For that navigate to the path given below
HKEY_LOCAL_MACHINE → SYSTEM → CurrentControlSet → Services
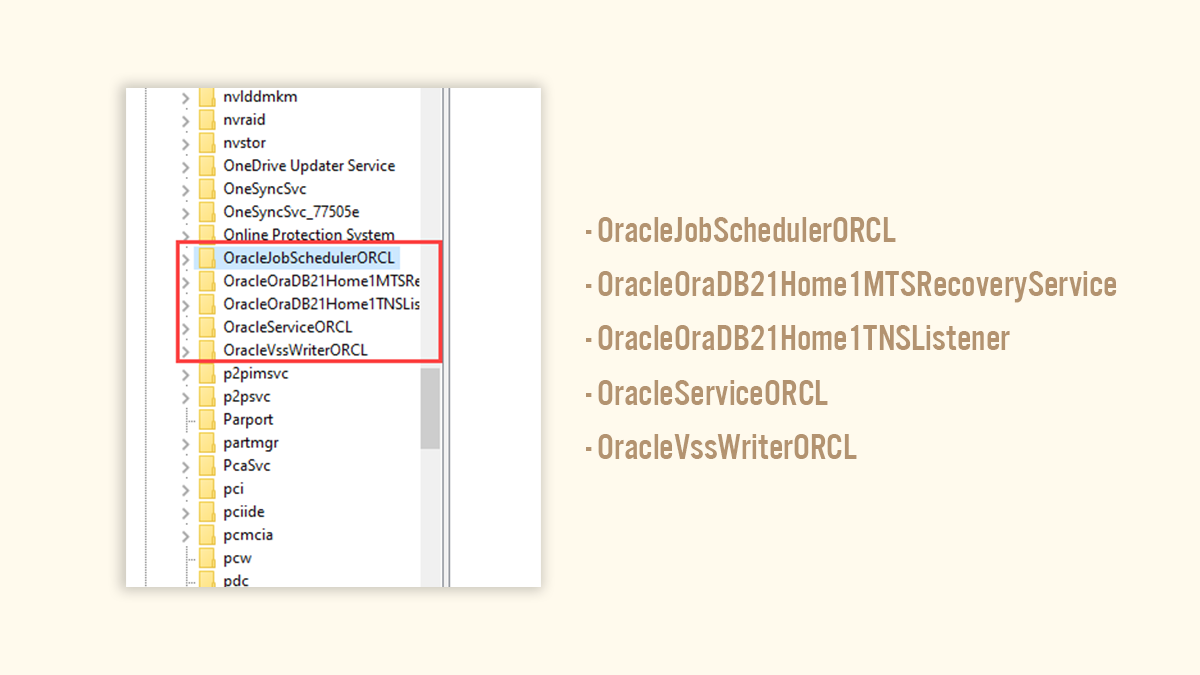
Inside Services directory find out all the services whose name starts with “Oracle” and delete them all. In my case these services are
- OracleJobSchedulerORCL
- OracleOraDB21Home1MTSRecoveryService
- OracleOraDB21Home1TNSListener
- OracleServiceORCL
- OracleVssWriterORCL
Restart Your Machine
Now to settle all the changes that we have made so far we have to restart the computer system. So restart your system and take a break.
Delete Windows User and Groups
In order to manage the working of Oracle Database 21c, the Oracle universal installer needs some Windows Groups and We manage those groups from Windows Users that we create during the installation of the Oracle 21c. To wipe out the Oracle 21c from the system we need to delete all these groups and users from the windows operating system.
This step will not work on windows home edition. This is one of the main reasons Oracle Databases are not compatible with Windows Home Edition.
Name of Windows User Groups
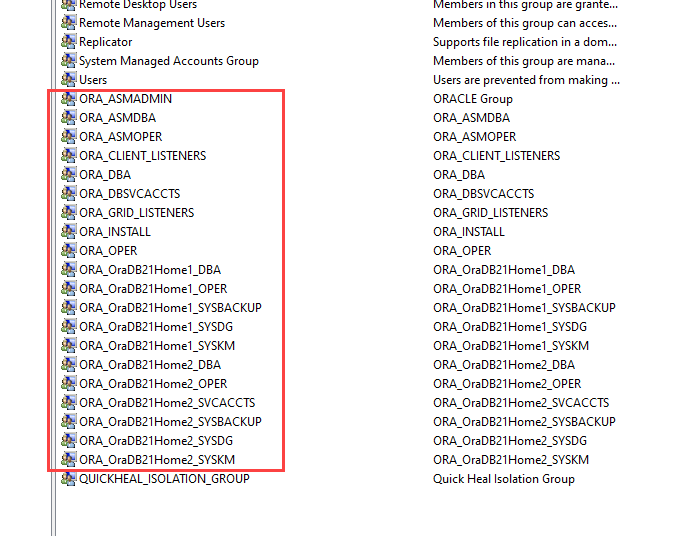
There is a total 14 number of user groups that Oracle Universal Installer (OUI) creates during the installation. These 14 user groups are –
- ORA_ASMADMIN
- ORA_ASMDBA
- ORA_ASMOPER
- ORA_CLIENT_LISTENERS
- ORA_DBA
- ORA_DBSVCACCTS
- ORA_GRID_LISTENERS
- ORA_INSTALL
- ORA_OPER
- ORA_OraDB21Home1_DBA
- ORA_OraDB21Home1_OPER
- ORA_OraDB21Home1_SYSBACKUP
- ORA_OraDB21Home1_SYSDG
- ORA_OraDB21Home1_SYSKM
Where To Find These Groups-
In order to access these groups, you need to open up the Local User and Group Window. For that once again open up the “RUN COMMAND” box by pressing Win Key+R. Then Write “lusrmgr.msc” (without quotes) into it. This will open up the desired windows.
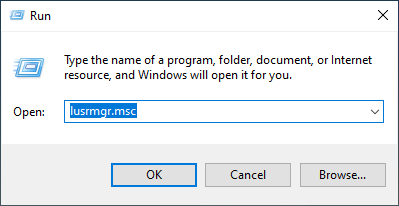
Inside this window, there are two directories Users and Groups. All the desired groups and users are placed inside these two directories.
Delete The Oracle 21c Windows User-
Let’s start by deleting windows user. For that go to the “Users” directory and find the windows user that you have created during the installation of the Oracle Database 21c and delete it.
Delete The Oracle 21c Windows Groups-
Next go to the “Groups” directory and find out all the 14 Groups that I listed above and delete them one by one.
But make sure to delete only those groups that I have listed above and nothing else.
Delete The Oracle Database 21c
Now we are all set to delete the Oracle Database 21c from our windows operating system. There are two main directories that need to be deleted. These are-
- Oracle Home, and
- Oracle Base.
Oracle Base & Oracle Home
Oracle Home is the directory where your Oracle 21c software is installed. Find out these two directories and delete them.
If you don’t know where your Oracle Home and Oracle Base is located. I have done a quick tutorial explaining how you can find their location in your system. Please refer to it –
https://www.rebellionrider.com/how-to-find-out-the-sid-and-db-home-in-oracle-database/
Not Able to Delete the Directories –
Many viewers complained that they were not able to delete the files and directories. In this case, chances are there that your system could have a pending restart so first restart your system and try again. However, if this still doesn’t solve your problem, then reboot your windows 10 in safe mode and then delete that file or folder.
One More Directory-
Apart from Oracle Home and Base, there is one more directory. The name of this directory is Oracle and it is placed inside the “Program File” folder.
This program file folder is placed inside the main drive where your operating system is installed. In most cases, it is in C drive.
Find out this directory and delete it but only when no other Oracle software is installed on your system. If there is any, then consult your System admin.
With this the uninstallation of Oracle Database 21c is complete. Hope you like this guide on how to uninstall Oracle 21c from windows 10. You can also check out my YouTube channel for more tutorials. Thanks and have a great day.
