
Are you looking to install PostgreSQL on Docker for production? In this tutorial, we’ll show you how to install PostgreSQL on Docker with persistent data.
Install Docker
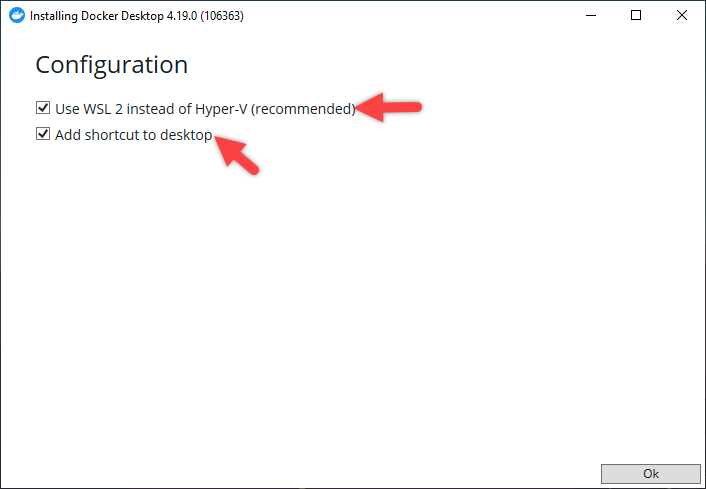
Before we get started, you’ll need to install Docker. To do this, visit Docker.com to download the version that’s compatible with your operating system. Once you’ve downloaded it, run the installer as an administrator. On the first screen, make sure both checkboxes are selected, and then press OK to complete the installation.
That’s it that’s all you have to do. Press close and you are done.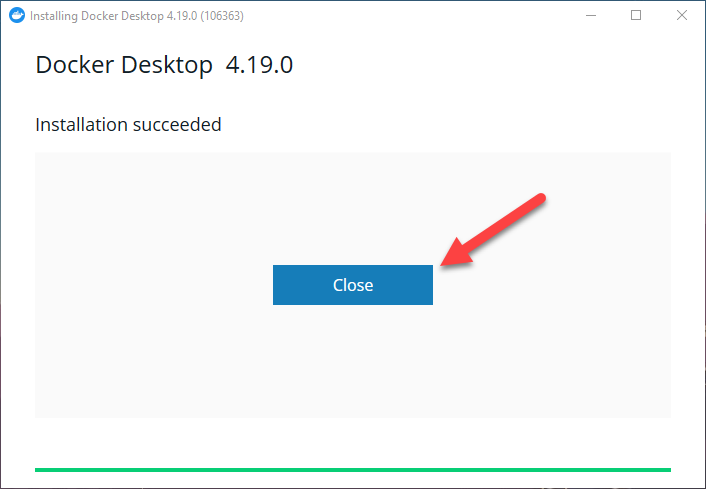
Next, navigate to the Docker icon on your desktop and double-click it to accept the license agreement. The Docker engine will take a few seconds to start up.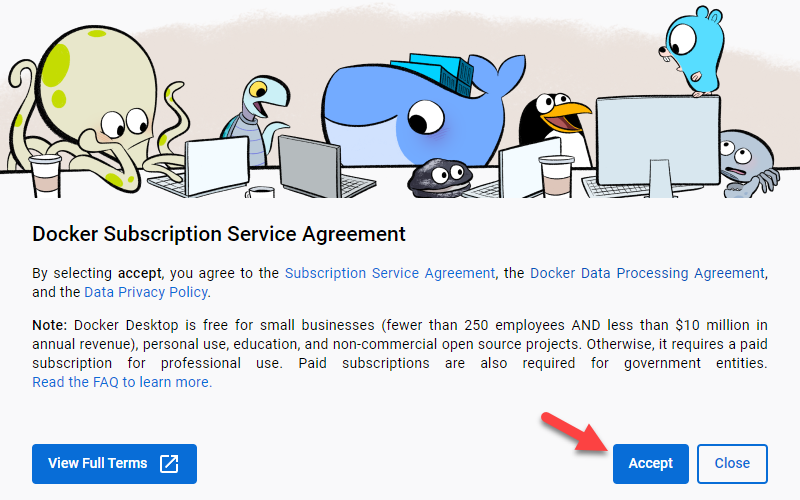
The Docker Hub
To download the official Docker image for PostgreSQL, head over to hub.docker.com and create an account (if you haven’t already). Use the search bar to find the PostgreSQL image, which should be the first result that appears.
Here’s the link to the official PostgreSQL image on Docker Hub:
link -https://hub.docker.com/_/postgres
We’ll only need two commands from this page: the first is ‘Docker pull’ to download the PostgreSQL image, and the second is ‘Docker run’ to create a container. We’ll modify the ‘Docker run’ command to fit production norms. Let’s continue and set up PostgreSQL
Setup Postgres
Now that we have installed Docker, let’s set up PostgreSQL on it.
Step 1: Pull the image
Open up your command prompt or shell (if you have installed Docker on your Linux or Mac) and enter the following command:
docker pull postgresThis will pull the latest image of PostgreSQL from the hub.
Step 2: Create The Container
To create the container, execute the docker run command. Here’s the breakdown of the command:
docker run --name postgres_img -d
-e POSTGRES_PASSWORD=postgres
-p 5432:5432
-v D:/postgres:/var/lib/postgresql/data postgres
The command starts with the reserved phrase docker run. Using the --name option, we give a name to our container (in this case, postgres_img).
Next, we have the -d option, which runs the container in the background and prints its ID once it’s done.
Using the -e option, we set the environment variable POSTGRES_PASSWORD and set the password (in this case, postgres). You can set your password to whatever you prefer.
We expose the port using the -p option. In this case, we’re mapping port 5432 of the container to port 5432 of the Docker machine. This option is essential if you want to connect to the PostgreSQL database using clients like PgAdmin, VS Code, or DBeaver that are installed on your operating system.
The -v option maps a directory on your local machine to a directory inside the Docker container. In this case, we’re mapping a directory we created on our D:/ drive named “postgres” to the /var/lib/postgresql/data directory inside the container. This is a virtual file system created inside the Docker container. Any data saved in this directory is not persistent. However, by mapping this virtual directory to a physical directory on our local machine (D:/postgres), any data saved in this directory will be copied to the local machine and will always be available, even if the container stops or restarts.
Finally, we have the name of the image we’re using to create this container.
Once you’ve entered this command, your PostgreSQL installation will be set up on Docker with persistent data.
We hope this tutorial was helpful in showing


