
Since the launch of Oracle 18c we were wondering, will we ever be able to download & use it on our local machine or will it just remain a cloud-only software? Well, ladies and gentleman, there is good news for you – Oracle has finally released an on-premises version of Oracle Database 18c for Linux as well as Microsoft Windows Operating systems. In this blog, we will learn how to install Oracle Database 18c on the Windows 10 operating system.
Just to make the installation easy to understand and less complex I have divided this tutorial into three small sections. These are:
- Minimum Hardware and Software requirements
- Download and acquisition of the Oracle Database 18c software, and
- Installation of Oracle Database 18c on Windows 10
Also, at the end of this blog, we will see what the default URL for Oracle database 18c enterprise manager is, thus I suggest you read it till the end.
Minimum Hardware and Software Requirements for Installing Oracle Database 18c
The minimum hardware requirement for installing Oracle Database 18c on Windows 10 is:
- 2 GB of RAM
- 10 GB of empty space on your hard disk drive
- 16 GB SWAP (virtual memory) space if RAM is more than 16 GB. If RAM is less than or equal to 16 GB then 1 times the size of the RAM
- A processor based on either Intel EM64T or AMD64 Architecture
- Minimum screen resolution of 1024 x 768 pixels.
I guess you’ll agree with me when I say that having more space than the suggested minimum is always beneficial.
Can we install Oracle Database 18c on x32 bit Microsoft Windows operating system?
Unfortunately no. Just like Oracle Database 12c, Oracle 18c in only available for x64 bit Microsoft Windows operating system.
Are all Microsoft Windows compatible with Oracle Database 18c?
Again the answer is no. Not all Windows are compatible with Oracle Database 18c. You can read this short note on my Facebook for the list of all the Oracle 18c compatible Windows operating systems.
How To Download Oracle Database 18c for Windows 10?
In order to install any software we first need to acquire all its necessary files. Currently, Oracle Database 18c is available for Microsoft Windows x64, Linux x86-64 and for Oracle Solaris. You can download your copy of Oracle 18c from here. Unlike previous versions like Oracle 11g, Oracle 18c has only 1 file which is around 4.4 GB in size.
Oracle Database 18c Download Link
http://www.Oracle.com/Download
Currently, there are only two versions of Oracle Database 18c that are available –
- Oracle Database 18c Enterprise edition and
- Oracle Database 18c Standard 2 edition
Luckily you will get both these versions bundled within that single file that I mentioned before. No need to download them separately. Ahh! What a relief.
In case if there is still any confusion about the downloading of Oracle 18c then I suggest you watch my Video on YouTube, here is the link. Pro tip: check the description for the timestamps.
How to Install Oracle Database 18c on your Windows 10?
Before we commence the installation of Oracle Database 18c make sure you are logged in to your windows using an “Administrative User”. It is highly advisable.
Step 1: Extract the files.
With Oracle 11g or 12c, we were allowed to set the location of our db_home directory. But starting with Oracle Database 18c we are introduced to a new concept which is Image-Based Installation.
In an image-based installation, the Oracle Universal Installer of 18c takes the location of its setup file and assigns it as its db_home location. That is why before you start extracting the content of this file, you need to first decide where to create your db_home directory.
So first create a directory either in your C:\ drive or D:\ drive and give it a relevant name. I created the directory in my D:\ drive and named it “db_home”.
Step 2: Initiate the Installation
Installation requires administrative privileges thus first locate the “setup.exe” file inside your “db_home” directory. Once you locate the file right click on it and select Run as Administrator. Doing so will launch the Oracle Universal Installer.
Pro tip:
If Oracle Universal Installer (OUI) doesn’t come up on clicking on setup.exe file then there may be a problem with the extraction of the files. Manual extraction could solve the problem. Double click and open the oracle 18c *.zip file that you downloaded à Press “control + A” and select all the files from there à drag them into the “db_home” folder that you created.
Manual extraction could solve the problem. Double click and open the
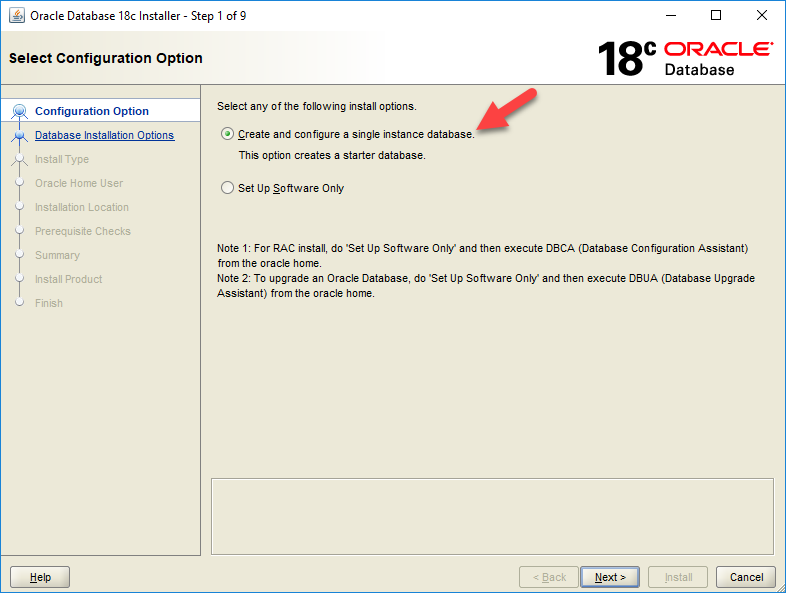
Screen 1: Configuration Options
On this screen, we are presented with two installation options.
Option 1: Create and configure a single instance database.
Choosing this option will not only configure an Oracle Database Server on your machine but also create a starter database for you. You can choose this database for learning and practicing purposes.
Option 2: “Setup software only”.
As the name suggests, it will only configure the Oracle Server software on your machine. No database will be created. You need to create the database manually using DBCA utility. You choose this option when you are configuring a RAC or Planning to perform an upgradation.
I will choose the first option which will configure the software as well as create a database for me.
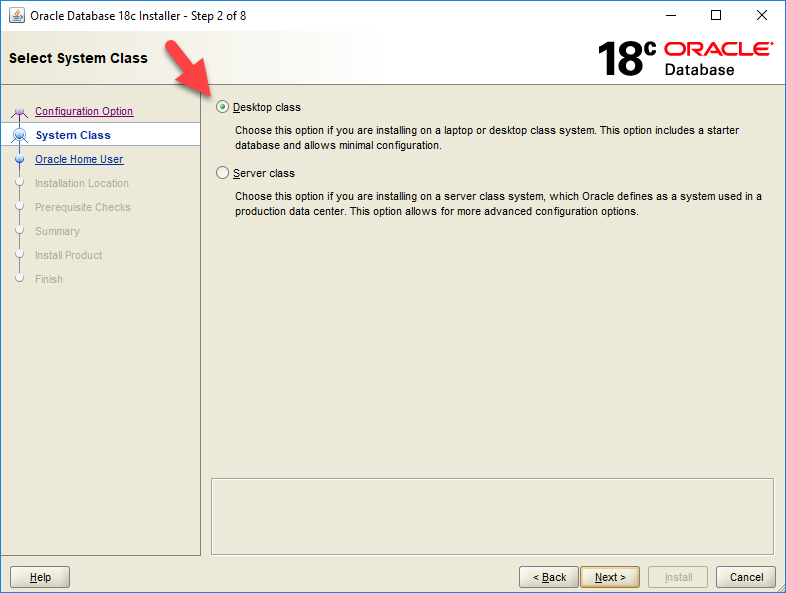
Screen 2: System Classes
In this step, you have to choose between Server Class and Desktop class.
Desktop class: If you are installing this oracle database 18c on your laptop or desktop then go with this option.
Server class: If you are installing it on a server which is capable of handling the load of all the server components and processes then choose this option.
In my case I am installing Oracle database 18c on a windows 10 professional which is installed on my laptop thus I will choose the first option which is desktop class and hit next.
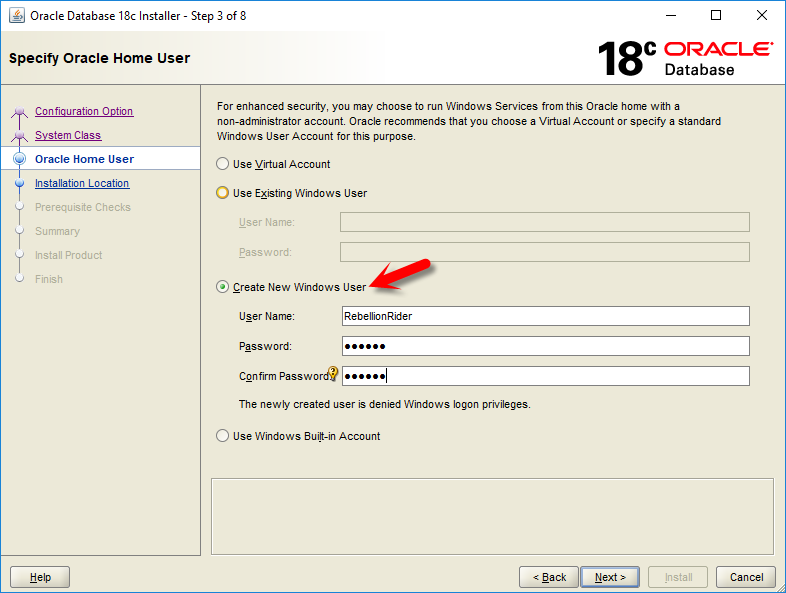
Screen 3: Oracle Home User
Oracle Installer creates 13 Windows user groups for doing various tasks such as handling security, taking care of user privileges and running Windows services for Oracle Database. To handle these groups Oracle server needs a dedicated Windows User.
In this step, we are provided with four options. These are:
- Virtual user: Use this option if you neither want to create a new user nor want to use any built-in or existing user.
- Use Existing Windows User: Choose this if you want to use an existing standard or administrative windows user which is already created.
- Create New Windows User: Oracle universal installer gives you an option for creating a dedicated user for your Oracle Database 18c. Using this you can create a Standard Windows User which is completely dedicated for your Oracle requirements. This user will not be allotted with logon privileges thus logging in to your system with this user won’t be possible but you can modify it like any other standard windows user.
- Use Windows Built-in account: Choose this if you want to use one of those user accounts which Windows 10 has created for you during its installation.
For enhanced security, Oracle recommends either using Virtual Account or Standard Windows user instead of Windows built-in account. Also, you cannot change this Oracle Home user once the installation is done thus be careful while creating it.
I will suggest creating a new and completely dedicated Oracle Database 18c user. To do that you have to select the third option which is “Create Windows User”.
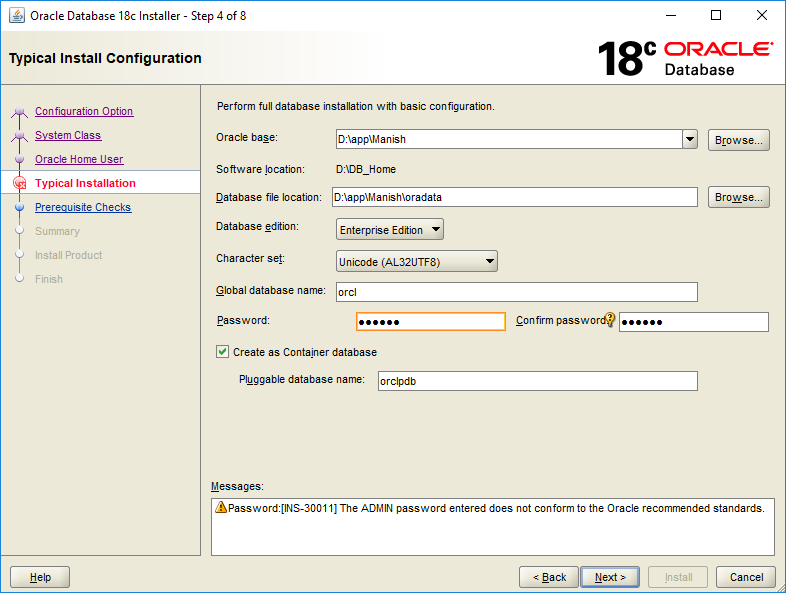
Screen 4: Typical Installation.
This is a very important step in Oracle Database 18c Installation as here we will be configuring the installation settings. Let’s understand what these settings are:
- Oracle base: Oracle Base is the base location for all the necessary files and directory for Oracle Database 18c. Here you will get a drop-down input field with one or two options already filled. Choose from any of these if you want to, but if you want to assign a location of your choice then hit the “Browse” button and select the desired location.
- Software Location: Famously known as Oracle Home or DB_HOME. This will be the directory where your Oracle Database 18c will get installed. Also, the location of this directory will be the one pointed by the environment variable.
Prior to 18c, we were allowed to modify the Oracle Home location but now as you can see the location is already set and we can’t modify it. The installer took the location of the Setup files and assigned it as the Oracle Home location. Hence the reason why we extracted our files into a separate directory. You can read more about Oracle Home here.
- Database file locations: This will be a subdirectory of the Oracle Base. This folder will be storing your database files such as Data files, redo log files, control files, server parameter files, and the password file. These are the most important files of Oracle Database so never mess with them.
- Database Edition: Here you will get a drop-down menu with the list of all the database versions available with your download. As mentioned above, our download comes with both the version of Oracle Database 18c which are, Enterprise Edition and Standard 2 Edition. Choose either of them accordingly. I suggest you to go with Enterprise Edition.
- Character Set: Let it be on its default value.
- Global Database Name (S.I.D.): The Global Database Name will be the name of your database and will serve as your database SID. You will need it while making a connection with your database using tools such as SQL Developer. By default, it is set as ORCL. If you want, you can change it to any other name, but make sure to remember it. I suggest you write it down somewhere as your Database SID.
- Password: This will be the password of your administrative users such as sys or system.
- Create as Container Database: Here you will get a checkbox. If you check this box then OUI will create a container database for you.
- Pluggable Database Name: Here you have to specify a unique name for your pluggable database. For this demonstration, I am good with the default name.
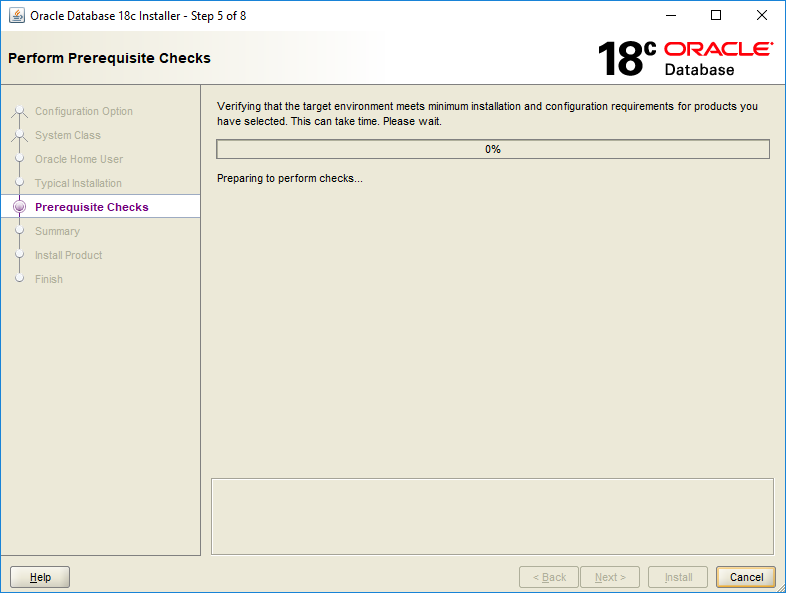
Screen 5: Prerequisite Checks
In this step, the OUI will check the prerequisites. If everything goes well then we will be good to install it. If there is any error then the OUI will show you here.
Screen 6: Summary
On this screen, OUI will show the summary of the configuration which you just did for your Oracle Database 18c installation. Here go ahead and press the Install button.
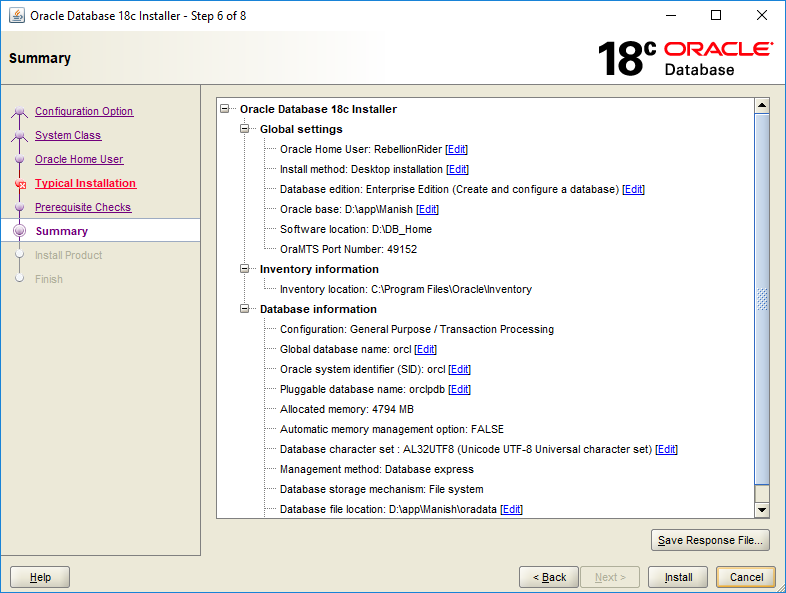
Unlike 11g and 12c in Oracle 18c, you will not get a DBCA separately for your database configuration. This new Oracle 18c Universal Installer has simplified the process.
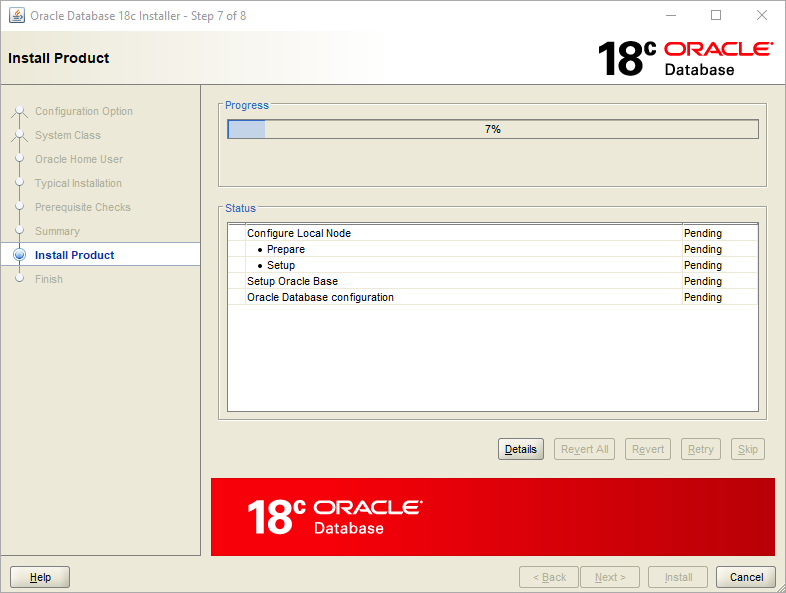
As Oracle Database 18c is a very hefty software thus this installation will take some time depending on your hardware thus have patience and let the OUI do its work.
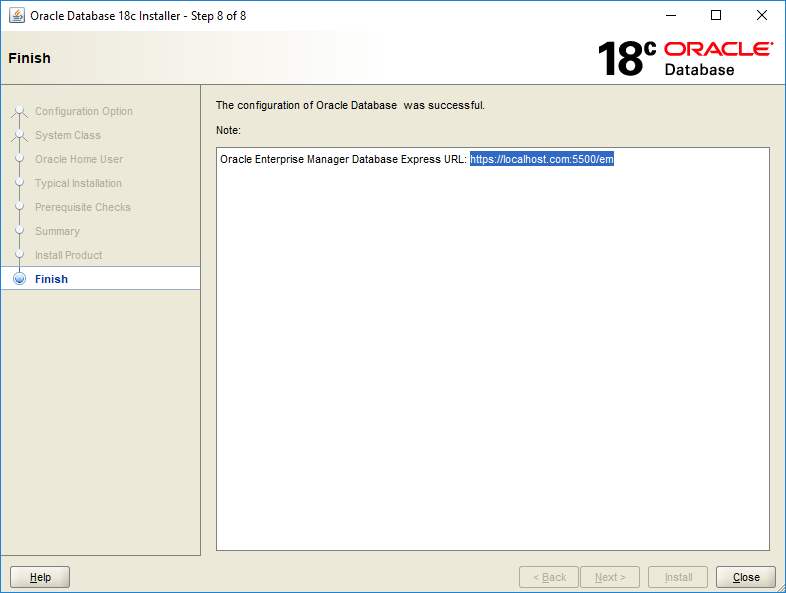
Once the installation is done the installer will show you the URL for your Oracle Database 18c Enterprise Manager. Enterprise Manager is a web-based tool for managing Oracle Database 18c. Copy and save that link. I suggest you to book mark that link.
If you learn faster by watching Videos then here I have created one for you–
So that is the tutorial on how to install Oracle Database 18c on Windows 10 x64. Hope you enjoyed reading. If you still have any confusions then you can watch me install the Oracle Database 18c in the video embedded above or you can reach out to me directly on my Facebook.
Thanks and have a great day.


[…] You can stay ahead of the game by checking out the installation and uninstallation of the latest version Oracle 18c on Windows 10. Also, read about them in detail on my blog post. […]